PPPoe setup on Windows 7
01. Click the Start button in the bottom left corner. The Start Menu will appear:
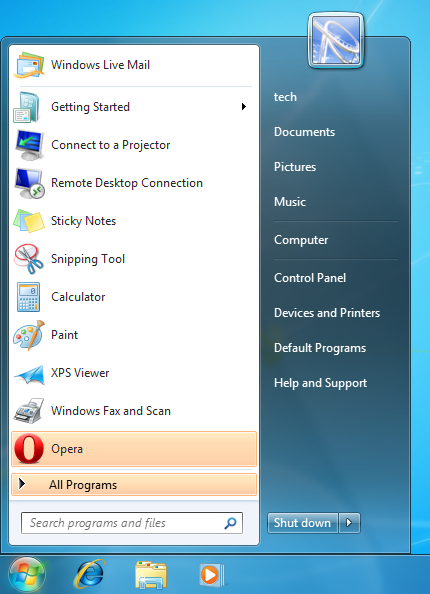
02. Click the Control Panel option in the right-hand column.
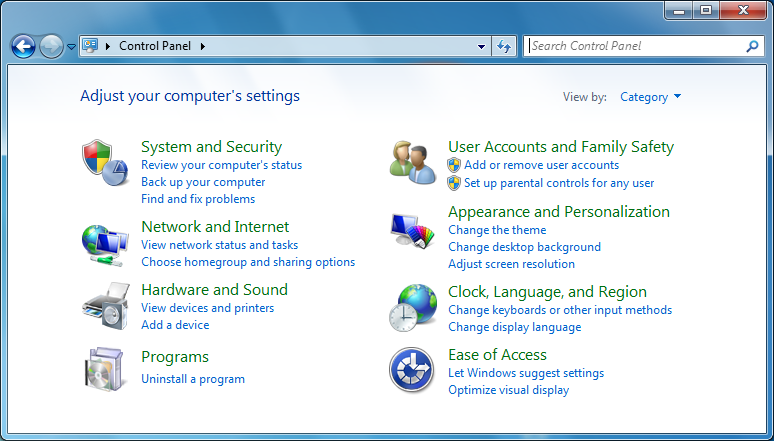
03. Click the "View network status and tasks" option under Network and Internet
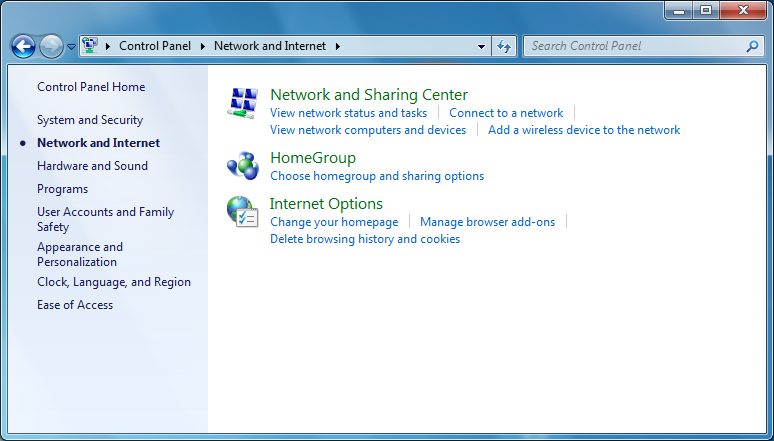
04. Click "View network status and tasks" under the Network and Sharing Center section.
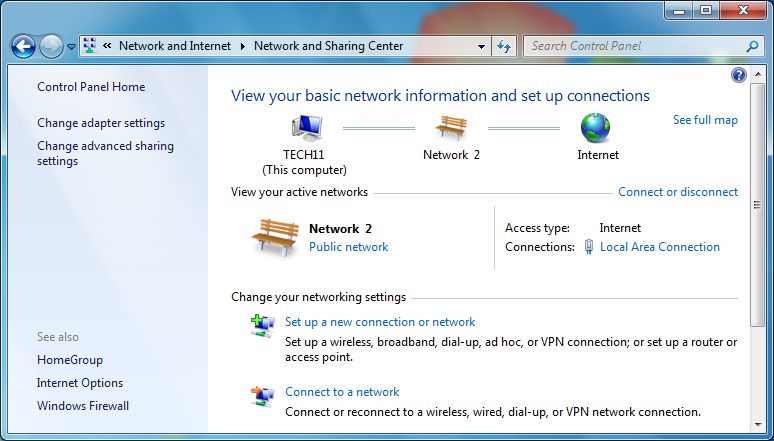
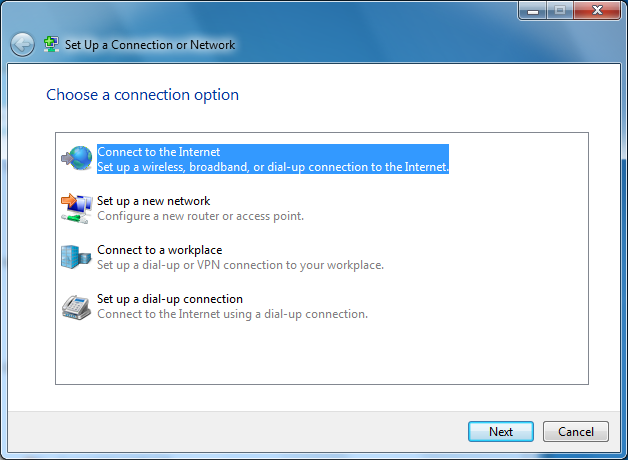
05. Click "Set up a new connection or network" under the Change your networking settings section:
06. Click Connect to the Internet and then click Next.
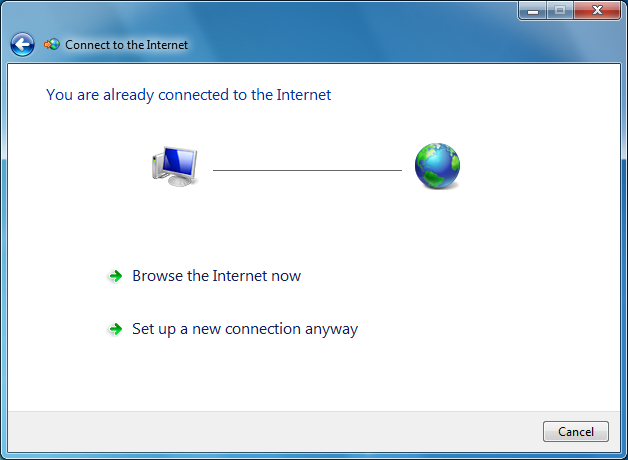
07. If you already have a live network connection, you may see this screen, in which case click "Set up a new connection anyway" and then click Next.
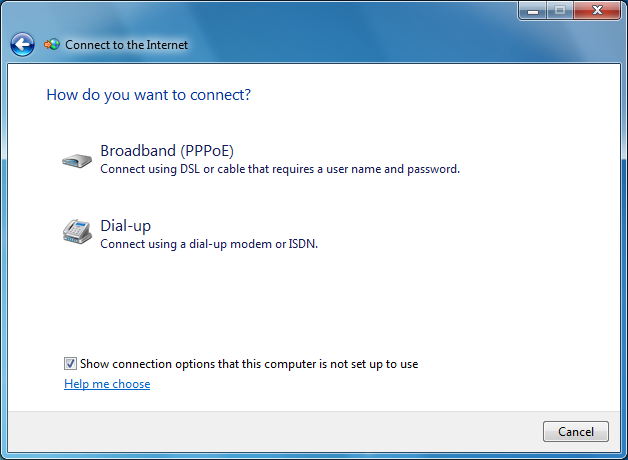
08. Click "Broadband (PPPoE)".
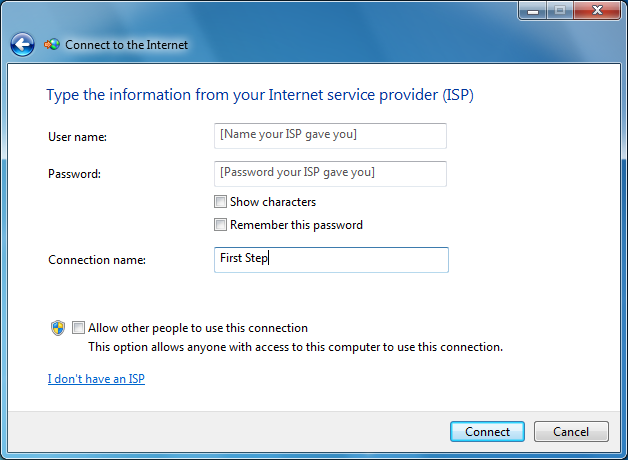
09. Enter your username in all lowercase and password that you chose when setting up the account. Change the connection name to "First Step" and put a checkmark in "Remember this password".
10. Click the Connect button to test your connection.
To Connect with PPPoE
Once the PPPoE connection is setup, you should do the following to reconnect with PPPoE.
01. Click the Network Icon in the bottom-right corner of the screen. This is the little screen with a cable thing on the left-hand side to the left of the Sound icon.
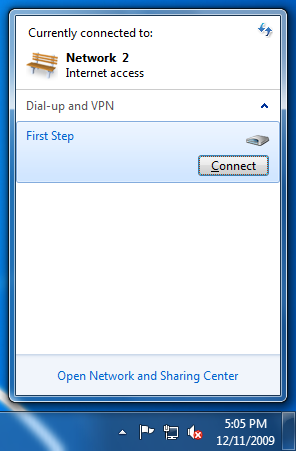
02. Click the First Step connection and then click the Connect button.